The Initial Idea
Brad EischensIn the fall of 2022, a buddy and I wanted a bow vise for working on our bows.
After looking up various brands, we saw they ranged from $140 for a standard vise or over $400 for a ball headed vise.
Thinking I could do it better, I set out to make one myself.
The Initial Experiments
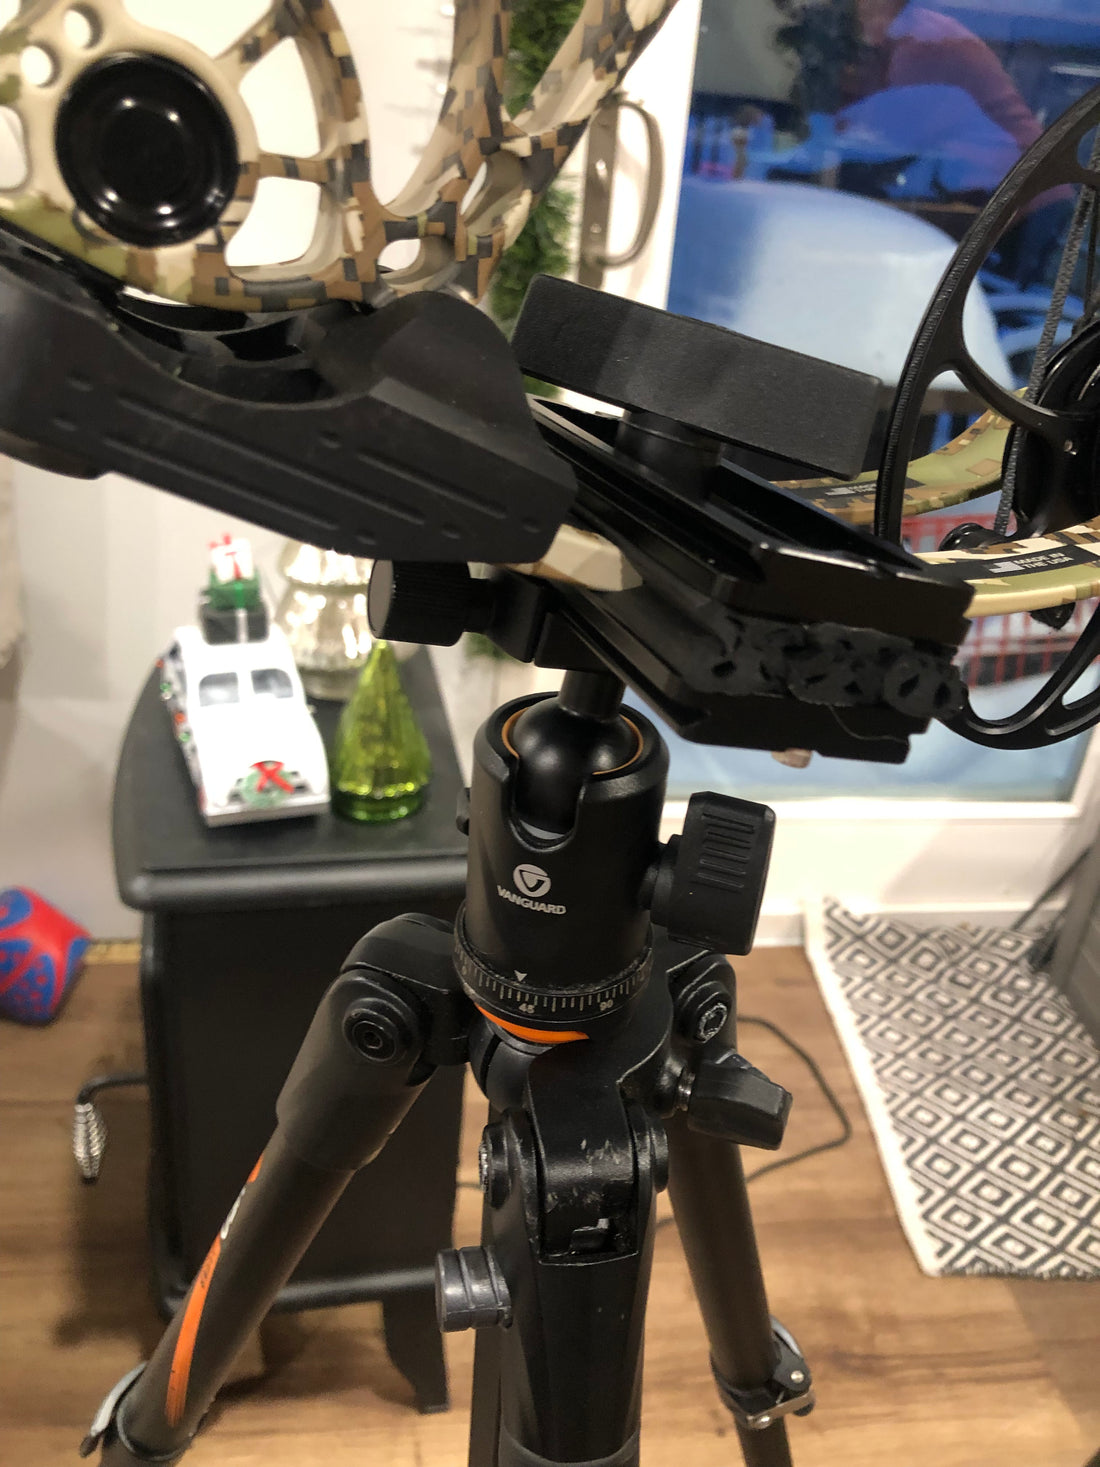
Having been a staff photographer for a news paper in college I though, "why not just use the ball head on my tripod?"
After a little experimenting with some bolts, a knobs and Arca-Swiss tripod plates I had laying around. I came up with a functioning (but very ugly) bow vise that we could use to tune our bows. The best part is, it was only about $15 worth of parts I already had!
But being an engineer, I was not satisfied and knew I could do better.

The Development of 'BowBars'
Knowing the tripod ball head was more than capable of holding our bows, I set out to make the clamping portion better.
I knew it had to have 3 things:
- 1/4-20 threads to attach to a tripod.
- Work with solid and split limb bows (we had both).
- Be affordable.
With those three things in mind I headed down to Menard's and purchased some 3M adhesive spray, a rubber stair tread protector, some 1/4-20 thumb bolts and thru knobs and a 1/4-20 tap. I then headed to the local metal supply store and picked up 2' of 1/4"x4" aluminum flat bar stock, which was more expensive than steel, but I could cut using my jig saw.
Total cost for the materials was about $50 and I if my calculations were right, I could make about 6 clamps with that amount of material.
Using my jig saw and utility knife, I cut out one 1" bar and one 2.25" bar from the piece of bar stock and 3 pieces of rubber, 1"x4" wide.
I then used a tape measure and center punch to 'precisely' mark out 3 holes on the top bar and 4 on the bottom bar. I applied the rubber using the spray adhesive and drilled the holes. I then tapped the 4 bottom plate holes.
That was it. I made my first prototype from scratch.
This process didn't leave me with a professional looking product but did give me a better idea of what the finished product would look like.

I called them 'BowBars' from the beginning simply because they were two aluminum bars that were used to make a bow vise.
Following that prototype, I ordered a 10' roll of 1" adhesive backed rubber online, found some better quality thumb bolts and thru knobs than the ones at Menard's and purchased a leather punch set from Harbor Freight for making holes.
The second BowBars prototype came out much better than the first, having clean holes and square rubber made a much nicer looking product. So I decided to make the remaining 5 sets to match that one.
All in, the cost of the project was now closer to $250 (including tools).

One request from my buddy was for it to have micro adjust (because who doesn't want that, right?)
I tried a bunch of different options but ultimately shelved the idea since making it work perfectly was outside my capabilities at the time.


A couple micro adjust examples.
Having made 5 sets of the bars, we both had out own bow vise and could work on our equipment at home and a few extra as spares. Perfect!
All for about $250 and a few hours of my time.
But wait, wasn't it suppose to be cheap?
Yeah, I know. We'd have been better off buying one and splitting the cost but dividing $250 by 5 is ~$50 each, so not too bad for a vise and we each got one.
What came next?
Fast forward a few months to December. Hunting season was winding down, indoor season was picking up and I began toying with the idea of producing the vises and distributing them.
Besides, it's simple. You make a product, you build a website, you put it online and people buy it!
How hard could it be? People do it all the time...

